Out here with Jenny Linquist playing Legends of the Hiden Temple


I went back and forth a lot on the radiator mount design for the 570. The bike is a blend between modern and vintage so coming to a design that fit the rest of the aesthetic was difficult. As much as I wanted to do some 80's inspired fiberglass fairing work, in the end it just made the front end look too bulky. The radiator is a big piece as it is so the mount and guard had to be as light and minimal as possible while still offering protection.
I quickly mocked up all the mounting points and surrounding parts in CAD to get a better idea of the design in 3D before going forward. Here's what I came up with digitally.


I sent the die lines of the center guard and mounting brackets over to get water jet out of 11G stainless then began bending up the perimeter piece. I used 1/2" solid T304 round bar in a manual bar bender.


I went through a decent amount of bends before getting to the point above where everything lined up. Downside was it was a lot of sections that would need to be welded up and filed smooth. After the 3rd attempt I knew the tolerance of the bender well enough to do it all out of one main piece and a small connecting piece. Two welds, much easier than 4.


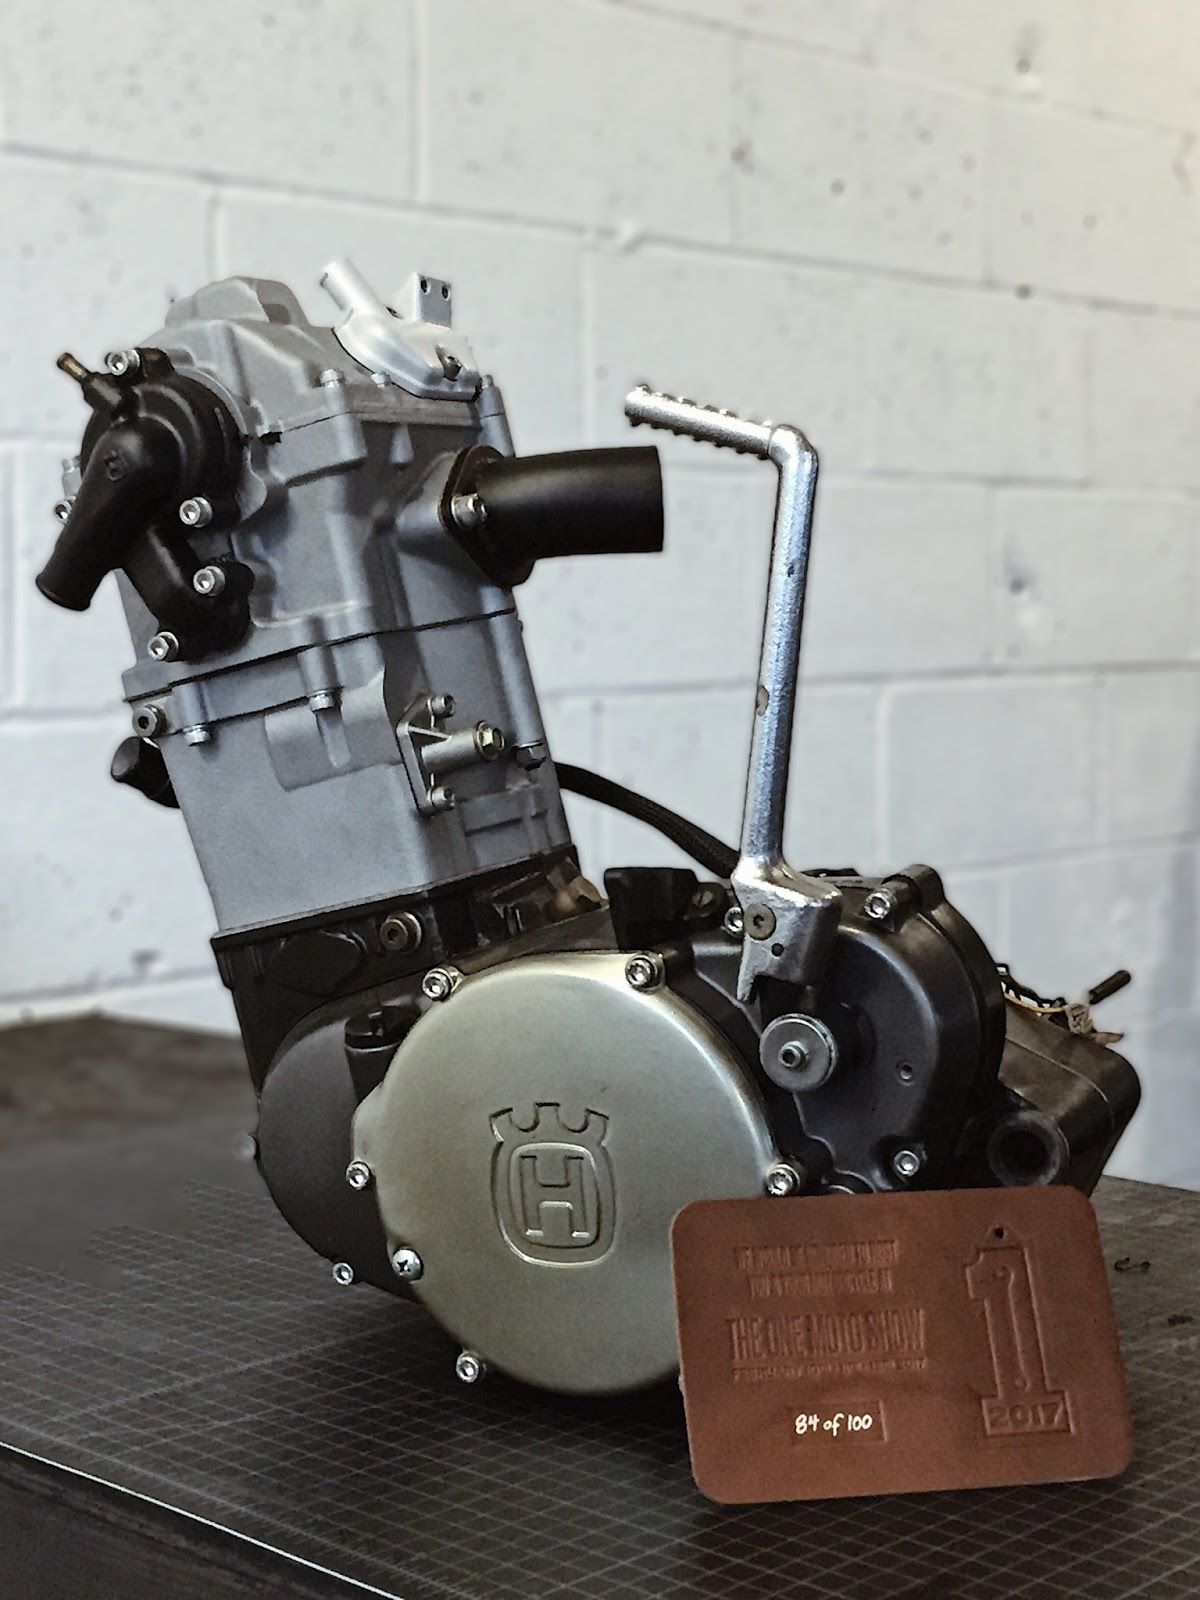
Welded in the rear brackets and painted them along with Mishimoto radiator. Polished the round bar and glass blasted the center section. Here it is at the One Moto Show.
 |
| Photo by Jason McGinnity |
 |
| Photo by Sean Donahue |
Finally got the Chicago shop all packed up and moved to Portland. The new space is 700 sqft with a lot of potential but needed some work to get there. A wall was dividing the 3 bays 2:1. I knocked the center wall down to open it up and let the light in from the bank of windows in the single stall. We then drywalled the ceiling in, ran more electrical lines and white washed everything.
We're going to work at adding more decor and a hangout space in the future but for now it's in do-shit mode. The One Moto Show is in 8 days and this Husqy needs to git done.


Motor disassembly to install the new clutch basket, valves, rings, and send the covers and upper cylinder out for powder coating.


Unfortunately I ran out of time. It's the 30th and our move has come. The Husqy went into various boxes and ziplock bags, destined for it's new PNW home. We're happy to get out of here before the snow hits. The new shop space awaits...

- Honda CX500 - cables, controls, badges, body panels, lighting, gauges, shocks etc.- Yamaha SR250 - seat, body panels, helmet lock & key, headlight, etc.- Honda CA95 - tank, fender, headlight fairing, etc.- Solid wood industrial stools, heavy duty - $50/ea- Honda and Yamaha seats - $25 ea- Bell custom 500 helmet, Medium. Burnt orange flake - $40- Pipe bender - $40- Motorcycle lift table - $75- 10" Alpine subwoofers - $20 ea.- 200W Jensen amplifier - $20- Clarion head unit - $50- Volvo 240 repair manual, new - $20- Volkswagen Mk3 Golf / Jetta repair manual - $10- Volvo 240 hub caps - $5- Bosch hammer drill, 2 batteries - $50- EU electric drill, jigsaw, angle grinders (Bosch, rotozip, Skill, Fein) - $20 ea.- bar end signals, new - free- Hardware storage bins - free- wrenches, screwdrivers, hand tools - free- Harley sportster mufflers - $15- IKEA standing and table lights - free- R65 rear fender - $20- Bike cover - $5- Emgo rear shocks - $10 ea.- BMW 17" Borbet Type T wheels - $100
A quick how-to on removing and replacing your worn clutch basket. Baskets will usually get grooves worn into them over time from the plate tabs and eventually restrict movement, causing the clutch to drag. The Husqvarna was doing just that so a replacement basket was purchased.
Many baskets are riveted to the steel ring gear behind them. Here's how to remove the basket without damaging the gear.

Use a center punch to mark the center of each rivet then drill through with a small bit (1-2mm). Use some cutting paste to save your bits from all the drilling you're about to do. I use "Coolcut" from Walter.
This clutch has a sleeve bearing. Make sure not to touch the inner bearing surface. It'll likely have metal shavings on it and you don't want to scratch it. I put my gear under running water and then blew it out with compressed air after separating the 2. If yours has a ballbearing tape it off before drilling.

Step up to a 4-5mm bit and drill a slightly larger hole. Make sure your bit is narrower than the holes in the gear so you don't bore out the steel. (check out the grooves in the basket and the broken prong.)

Here's what it'll look like from the backside. What you've done is weakened the structural integrity of the rivets and given yourself a guide hole for the next step.


Drill down until you start hitting the aluminum of the basket. You can feel the different between the steel rivet and aluminum basket. What you need to do is drill away the rivet's head. Eating into the basket a bit is fine since it's trash.

Next find a punch that's larger than your pilot hole but smaller than the hole in the steel gear. Punch out the remaining rivet. It should pop right out with a few whacks. If not then you probably haven't drilled away the rivet head entirely.


Many aftermarket clutch baskets are reattached with bolts instead of rivets. I scored this lightweight Surflex billet clutch basket off eBay. (One of the few company's that makes one for the TE) It came with steel rivets instead of bolts. To reapply the rivets you'll need a rivet hammer (pneumatic) and bucking bar. Here's a video on how to use a rivet hammer. Otherwise you'll need to find a shop that has one.
I happened to have everything from a previous project with Snap-on. The steel rivets require a higher PSI to squash. I had my gun setup at 120psi in order to get them to deform enough (1.5x the size of it's start diameter). Use several small c-clamps to hold the 2 pieces together while riveting so there's no play in the fitment. Sorry, I installed the new basket on a different day and forgot to take photos.

